Using Gitea Cloud for game development

In this article, we will cover Git features such as LFS and sparse checkout, as well as how to properly configure Unreal Engine so that multiple users can work on the same layer at the same time. We will also set up a Gitea Cloud instance for our Git server.
Prerequisites
- A Gitea Cloud instance. We will show you how to set it up.
- You need Unreal Engine and a proper content example, which you can get from Epic Games Store
- A Git client or the Git command line. We will use Anchorpoint in this tutorial, which is optimized for game development
The differences between game and software development
Although the workflows are very similar to software development, game development has two additional challenges that software development does not.
Heavy binary files
Textures, 3D models, audio, etc. are all binary files that cannot be properly diffed and merged. To overcome these problems, we need to use the Git LFS to store binaries and use file locking to prevent merge conflicts.
It involves artists
It involves non-technical people who may not be familiar with Git at all. We need to keep things as simple as possible.
Git LFS
Git Large File Storage (LFS) is an extension that stores binary files in a dedicated space (usually in an object store). In the Git repository itself, it stores a small pointer file pointing to the original file. Most Git GUIs support Git LFS with a little configuration up front.
A GUI
The Git command line may not be the most comfortable interface for non-technical people. A GUI will provide a visual interface offering an alternative for them. In this article, we will use Anchorpoint, which is optimized for artists and therefore comes with a simpler UI and file locking.
Setting up your Unreal Engine project
Unreal Engine comes with a built-in git plugin, but we don't recommend using it. The problem is that it performs a "git add" command after every backup of a file, which slows down development due to it doing a scan on every file in your project. There is a better version of the Git plugin called "Project Borealis" if you want to use it in Unreal Engine.
We will also use a feature called World Partition. As mentioned above, you need to lock files to prevent conflicts. If we want to work on an open world game, only one person can work on the level file because it's locked. This definitely slows down the development process. World Partition splits the level file into small files, so there is no need to lock the whole level. Multiple people can work on the same level, and our commit size is smaller because these subfiles are much smaller than the whole level file.

Your project in Unreal Engine
A game development project consists not only of the game engine, but also the art files created in Blender, Photoshop, Substance Designer, or any other content creation application. We want to put them into our Git repository as well, to have everything in one place. This works well for a small team where access control is not an issue. If your team is larger, it might make sense to put the art files in a different Git repository so that you can control who has access to the Unreal Engine project and who has access to the art files.
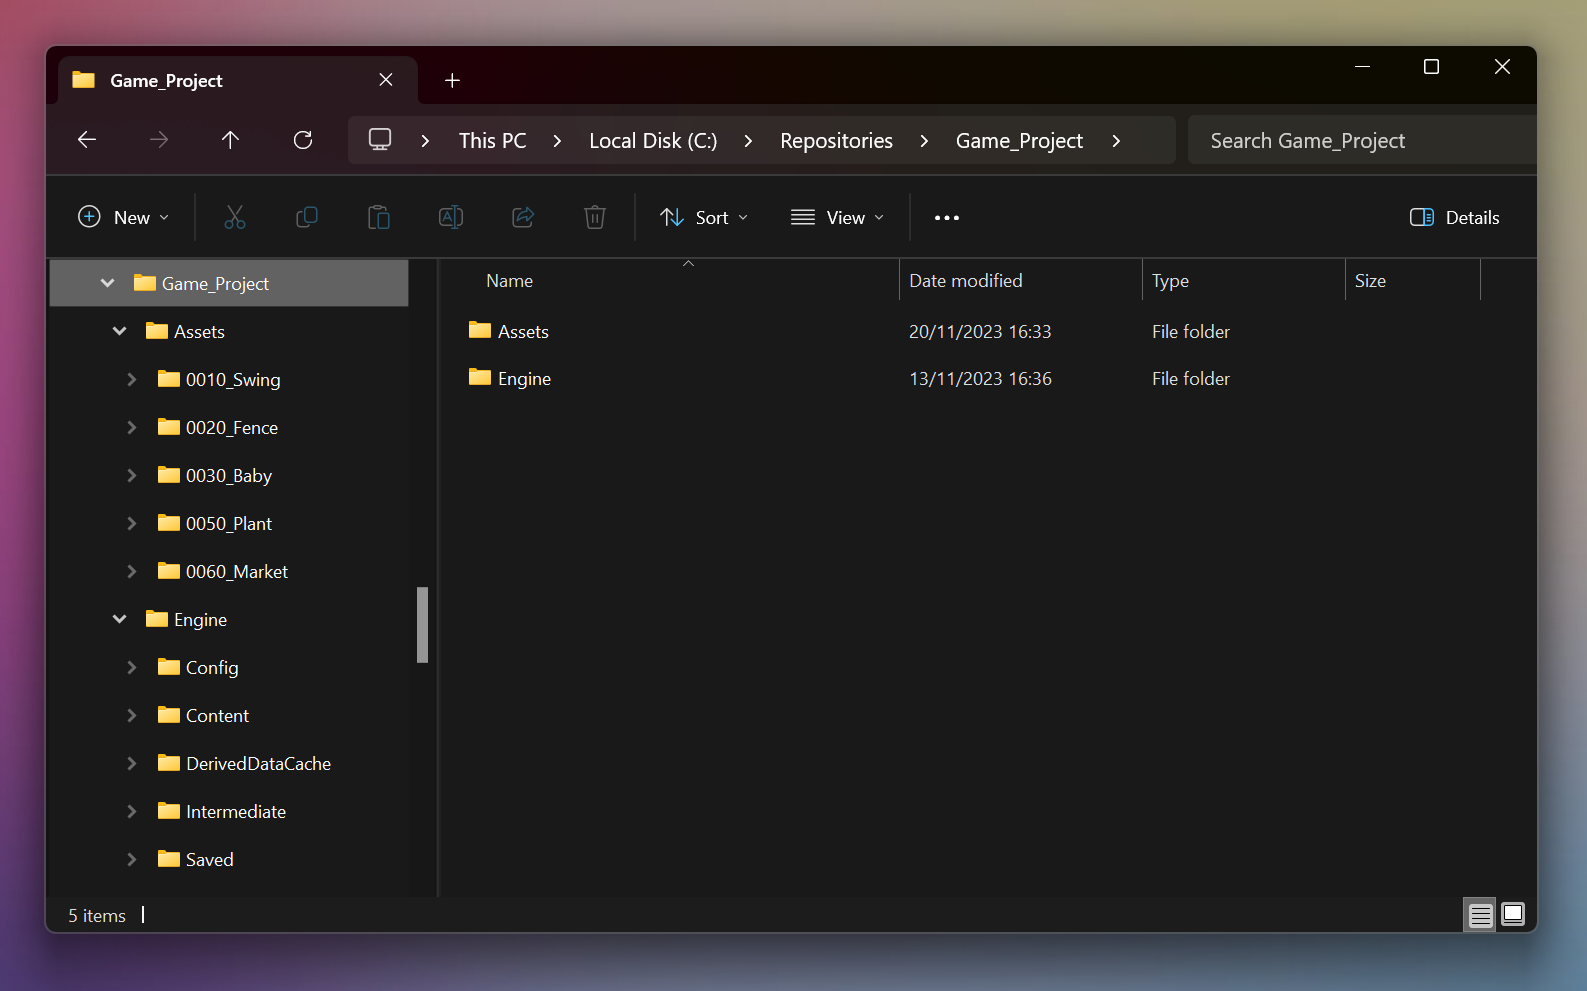
The project structure that includes the assets, created in a DCC such as Blender
Setting up our Gitea instance
We will be using a Gitea Cloud instance. This is a managed offering of the open-source Gitea project from CommitGo. It includes support, backups, managed CI/CD runners, and everything else you would have to do if you set up a Gitea server yourself. A Gitea Cloud instance runs on its own dedicated infrastructure, so we don't have to worry about speed issues when network demand is high, or any noisy neighbours. This tutorial will still work if you wish to setup and manage an instance yourself.
Additional note about the Gitea Cloud trial
For instances with less than 20 users a Gitea Cloud instance comes with a 30 day trial, so you'll have plenty of time to try it out. However, the trial does not include the additional storage add-on, which you'll need for significant Git LFS usage. If you don't want to commit to a paid plan yet, you can start your trial without the storage add-on, and you'll still get 10GB per user for free anyway. You can always buy more storage later.

Go to cloud.gitea.com and create a new Gitea Cloud account

Create a new instance
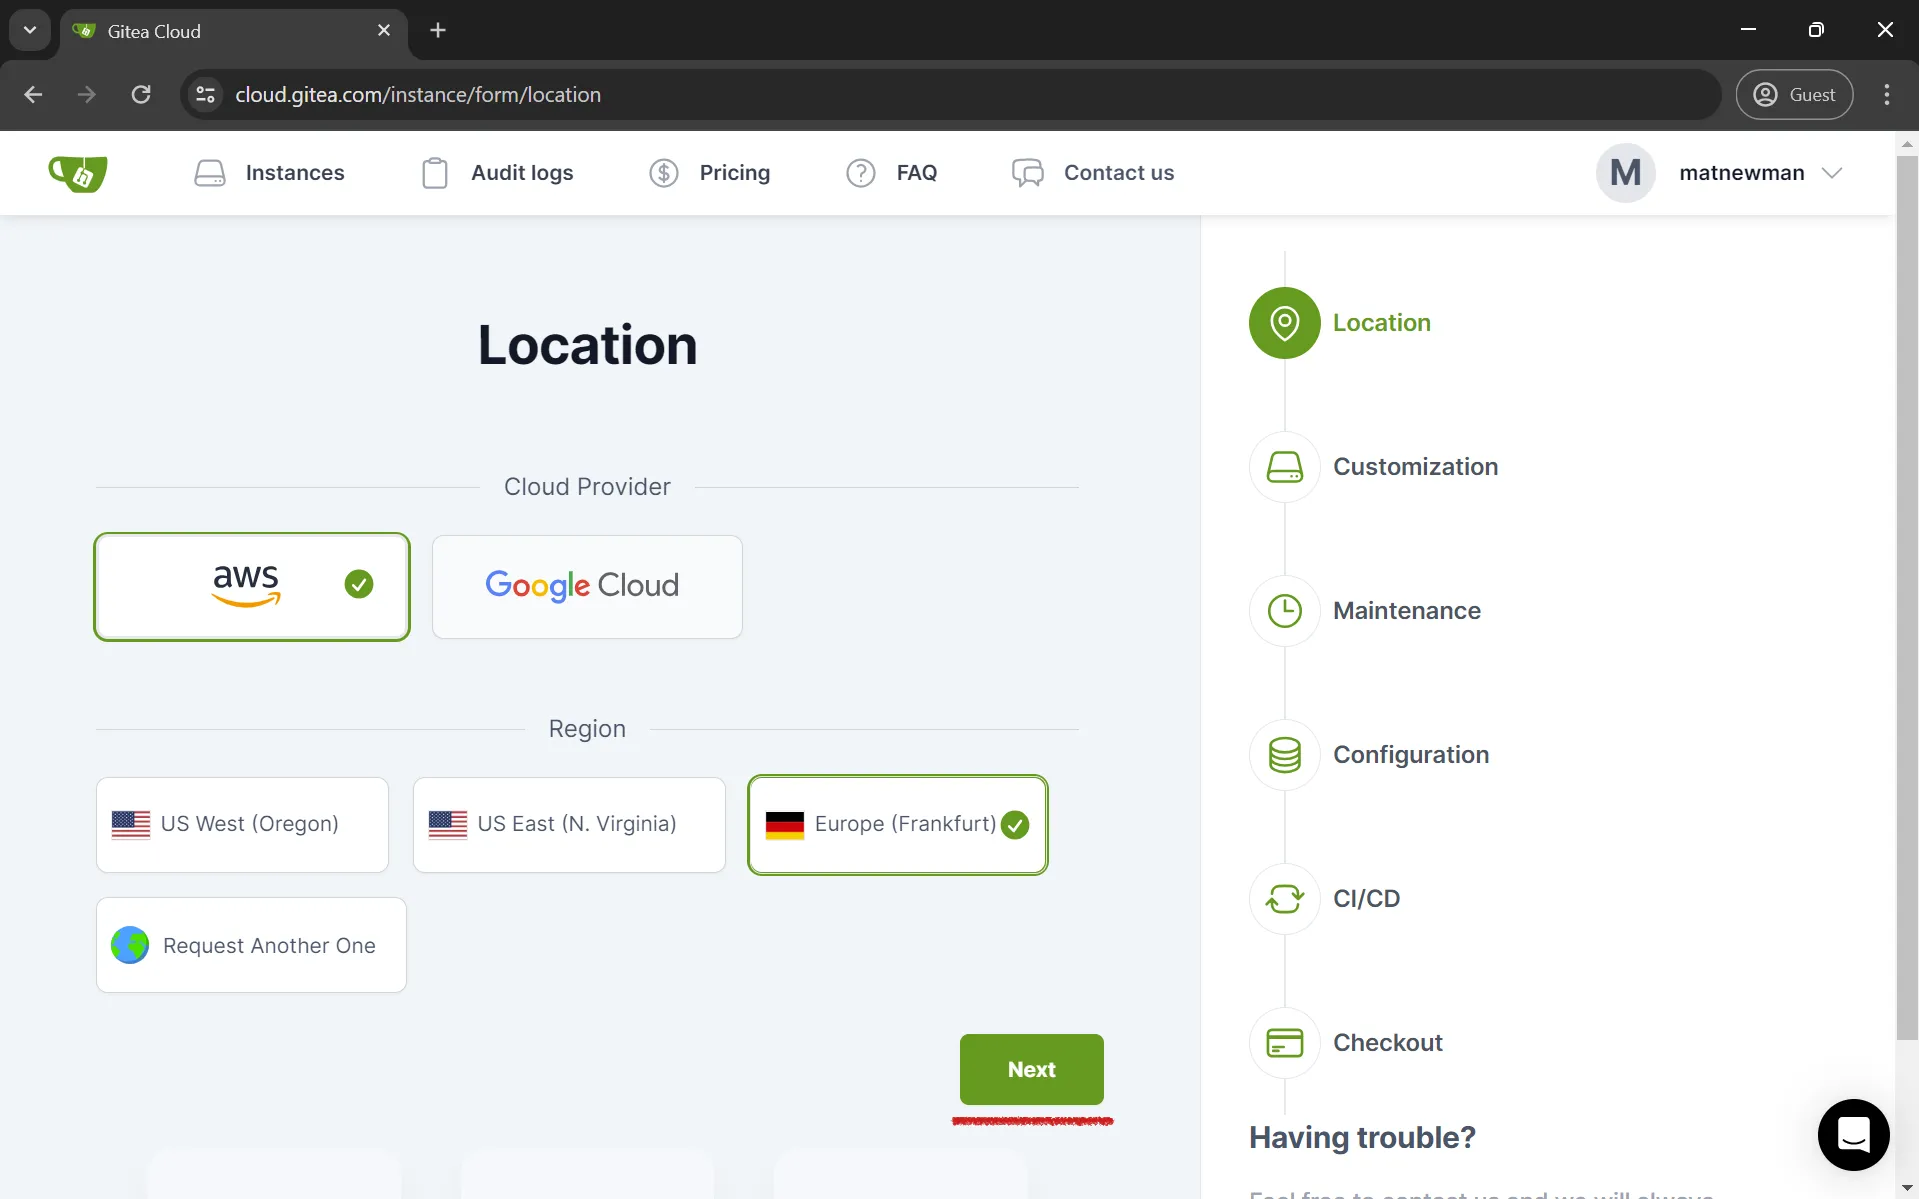
Pick a cloud provider of your preference and a region that is closest to you

Enter the name of your studio and create an account for the main admin of the cloud instance
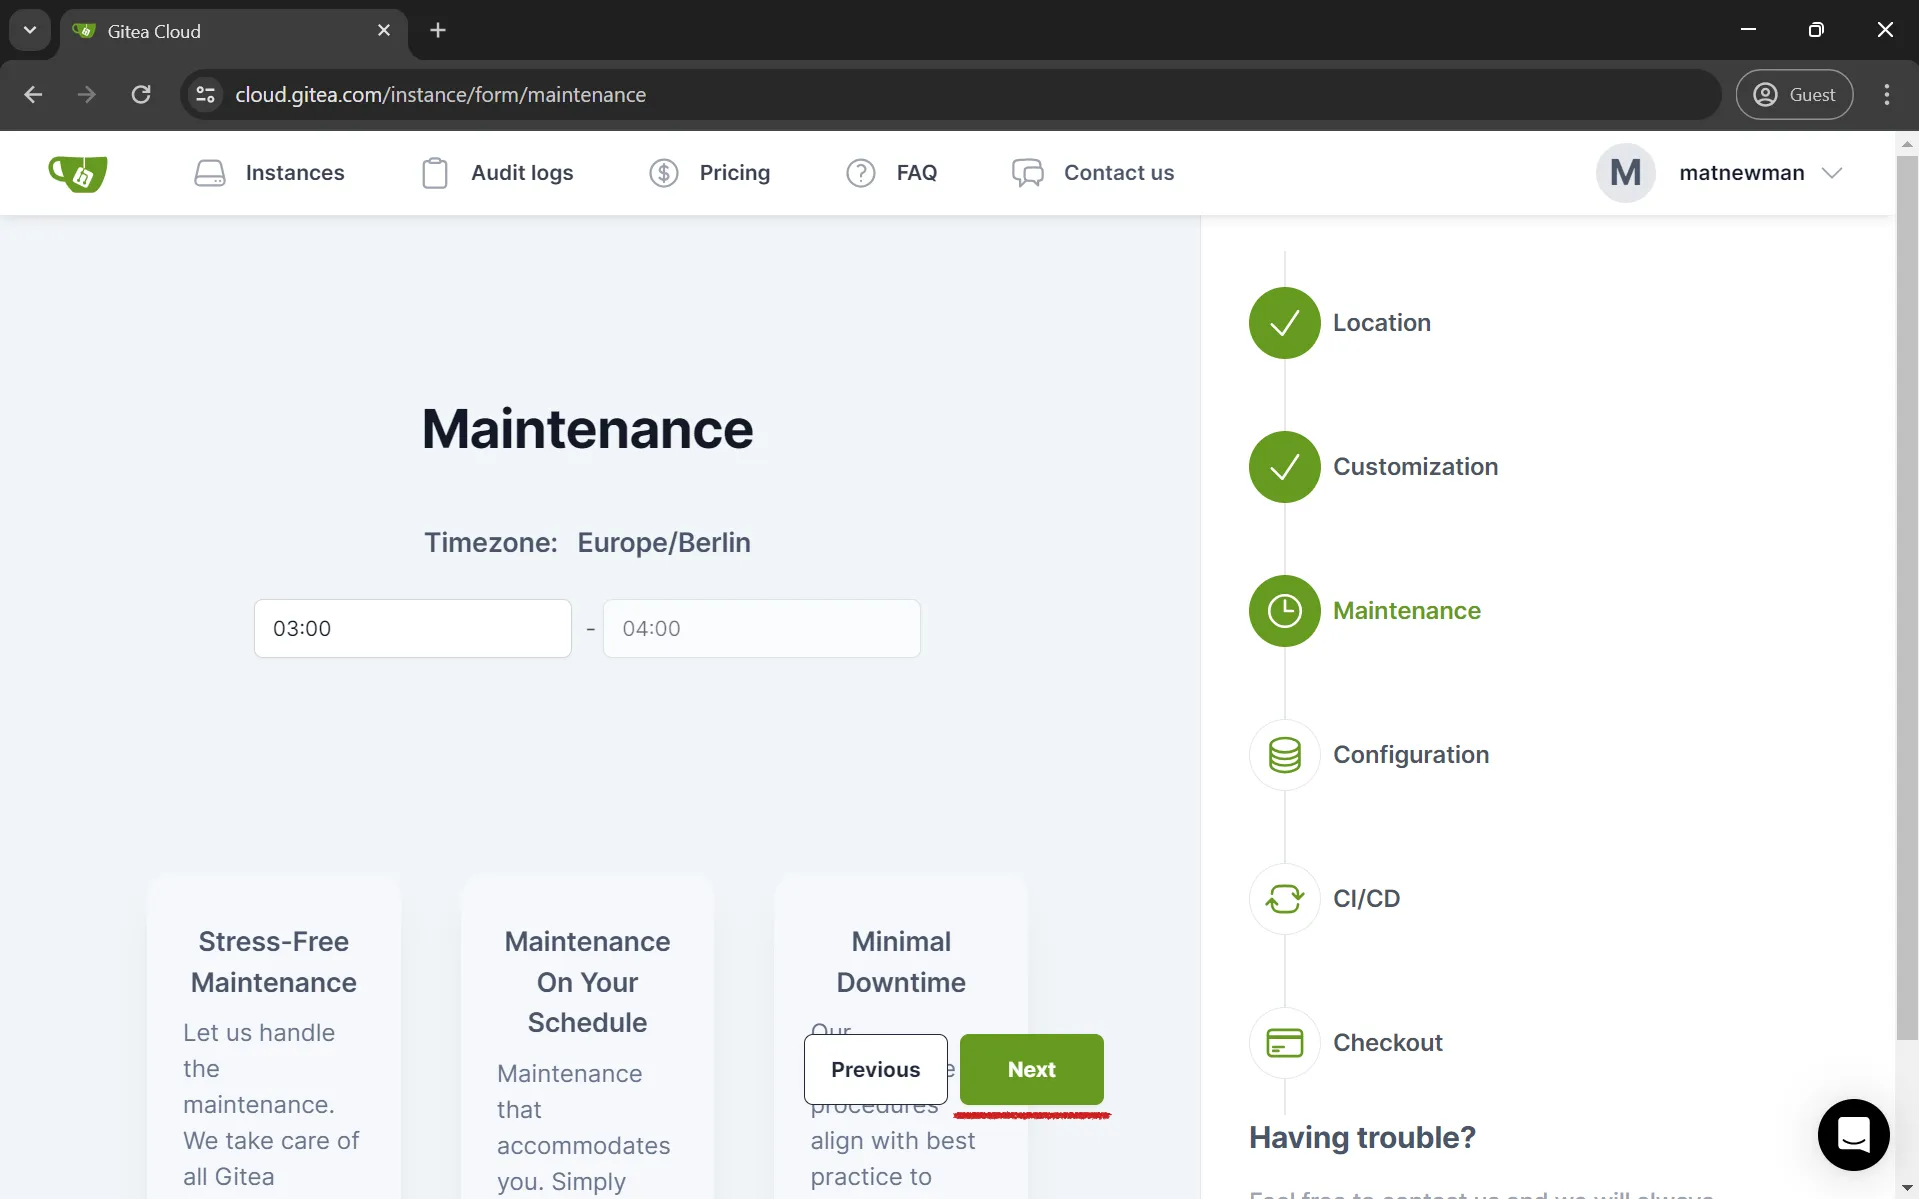
Normally, the default maintenance timeframe is fine. This is where the server may be unavailable for a short time due to updates. Pick something that is not during your working hours when a lot of pushes and pulls might happen.
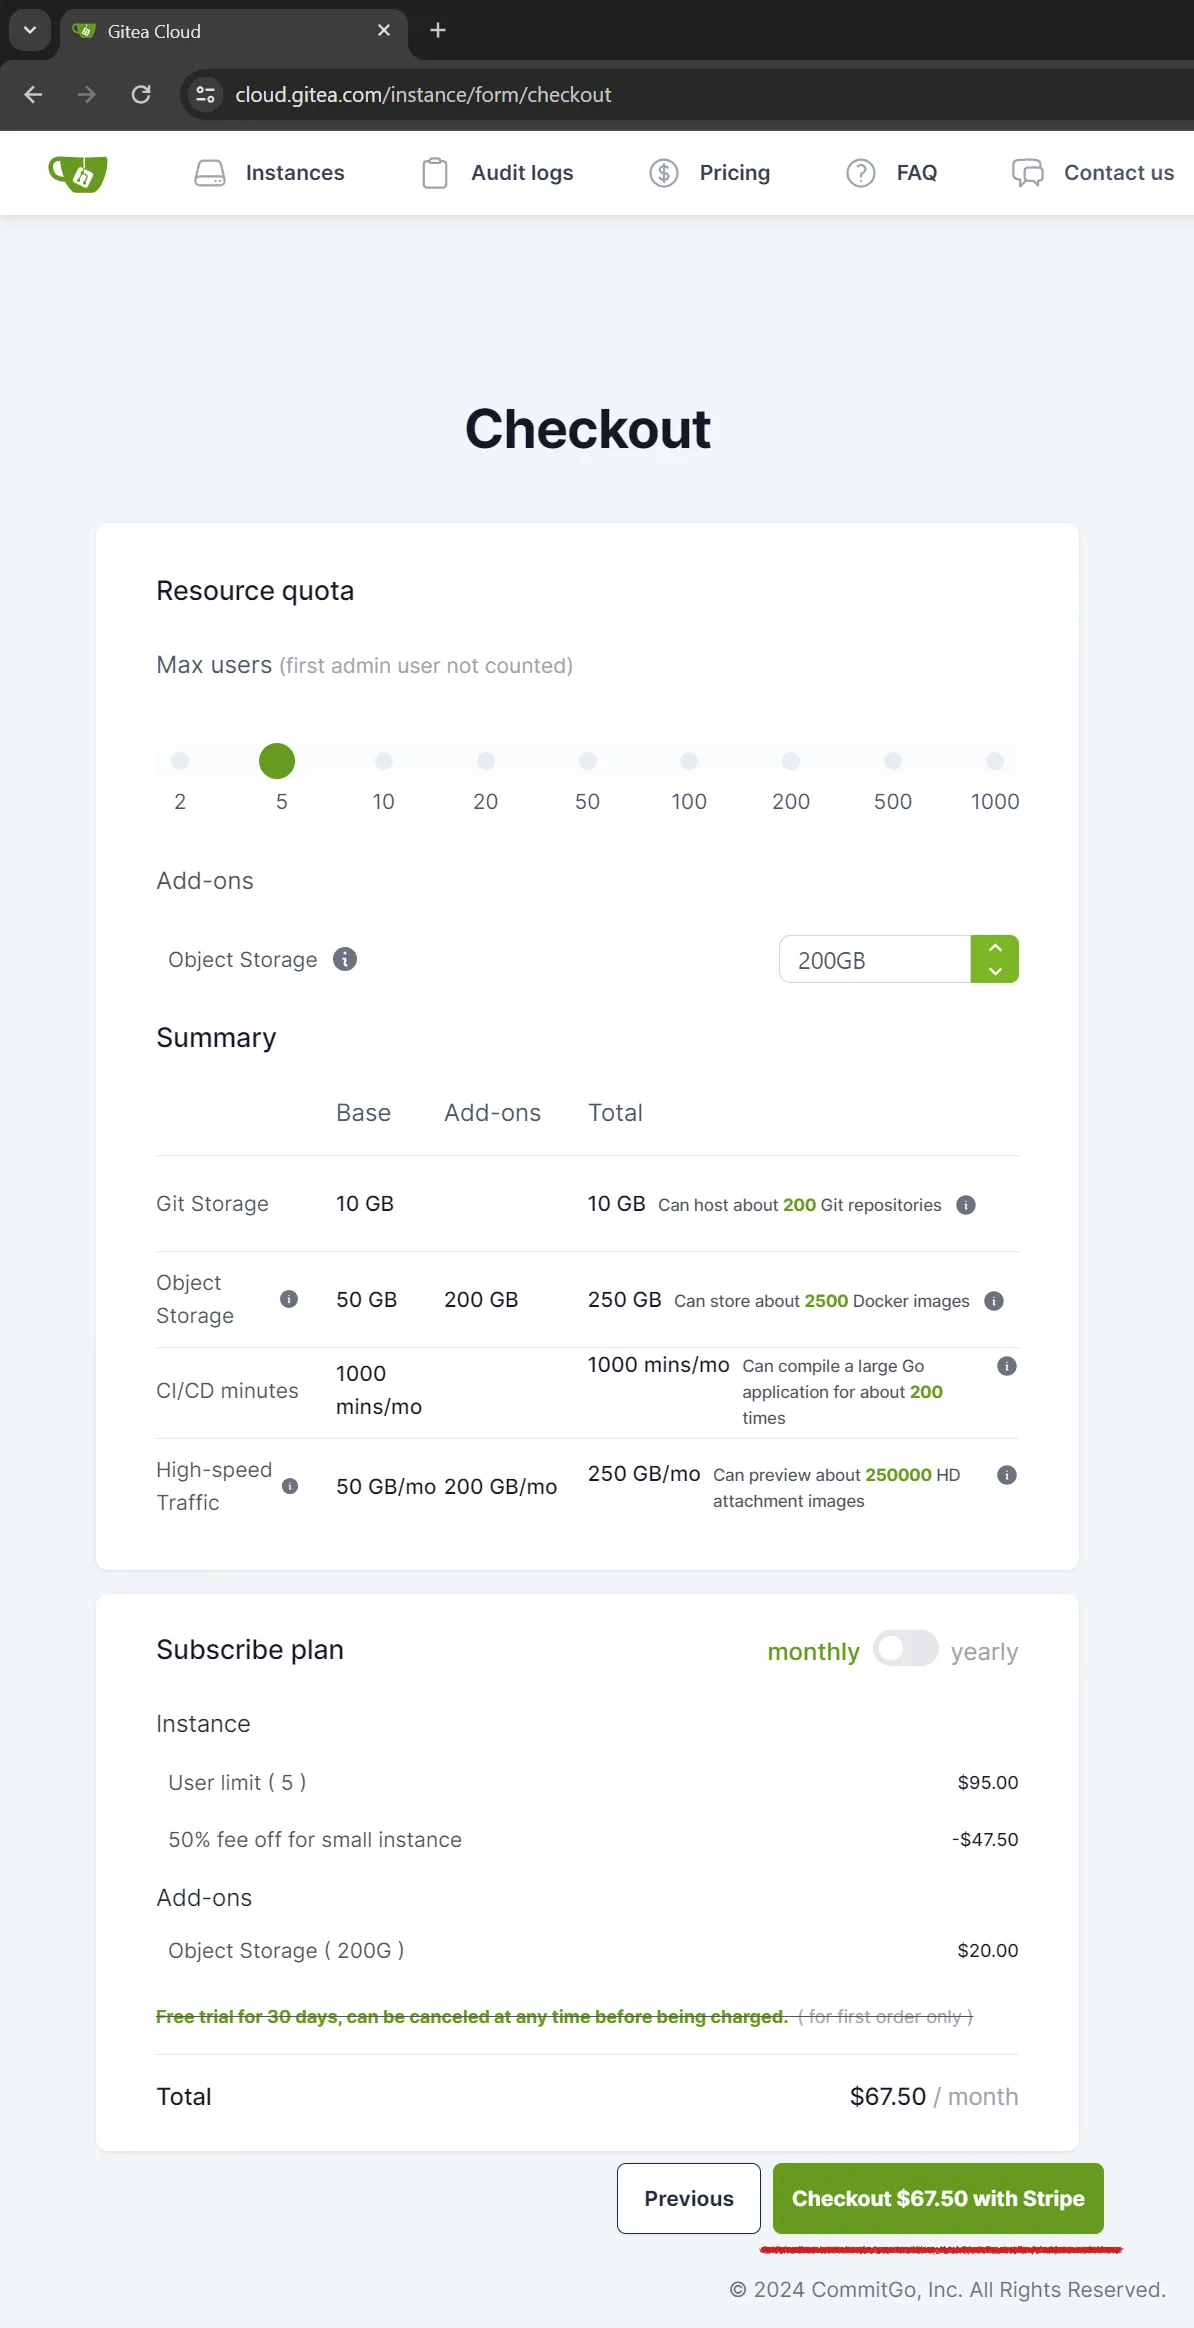
Add your users and additional "Object Storage". This is the storage that will be used for our Git LFS data. Note that this is not only the size of your project, but also the project history. Gitea does not charge for traffic (which includes all your pulls/downloads from the server). When you reach a certain threshold, your speed will be slightly reduced until the next month. The next step is to add payment information to get your instance running.
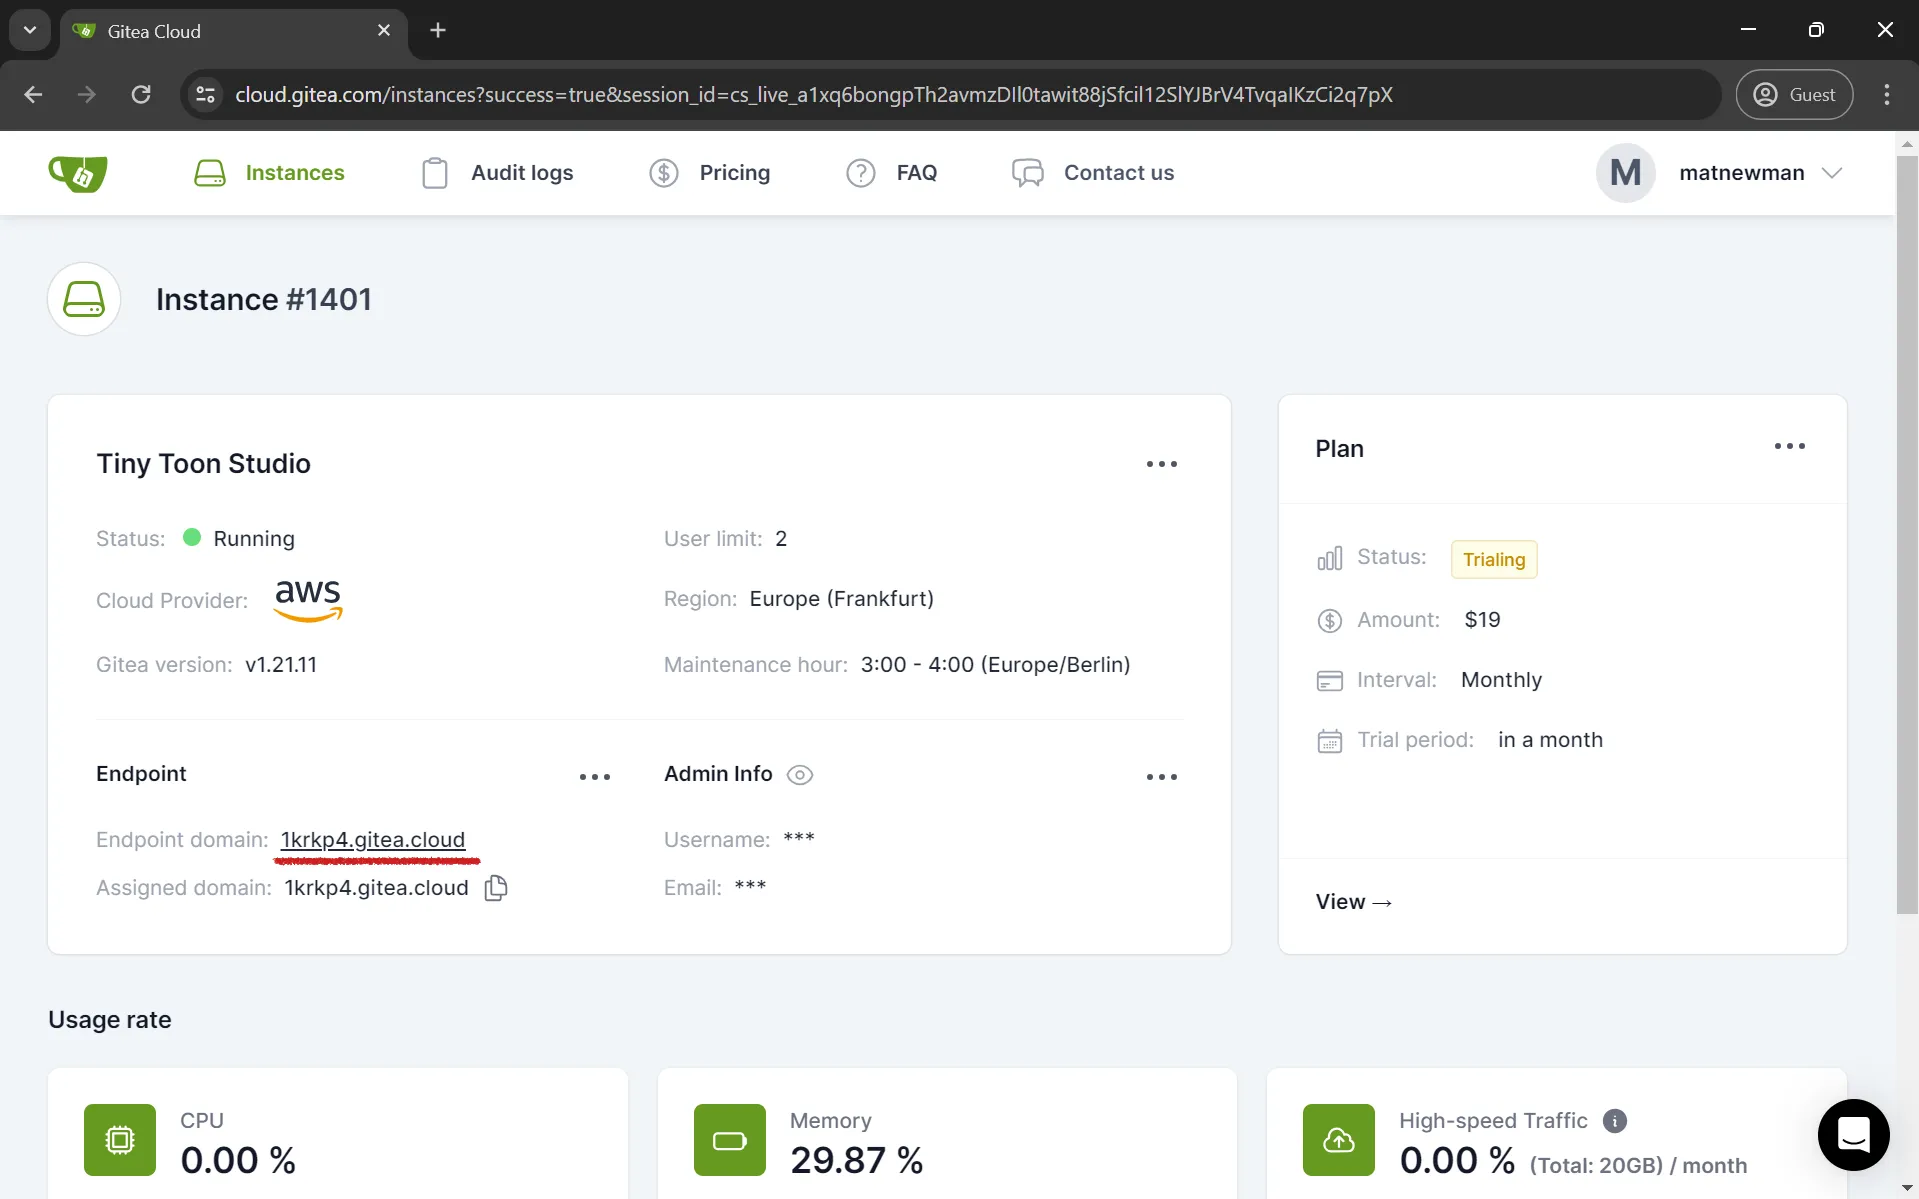
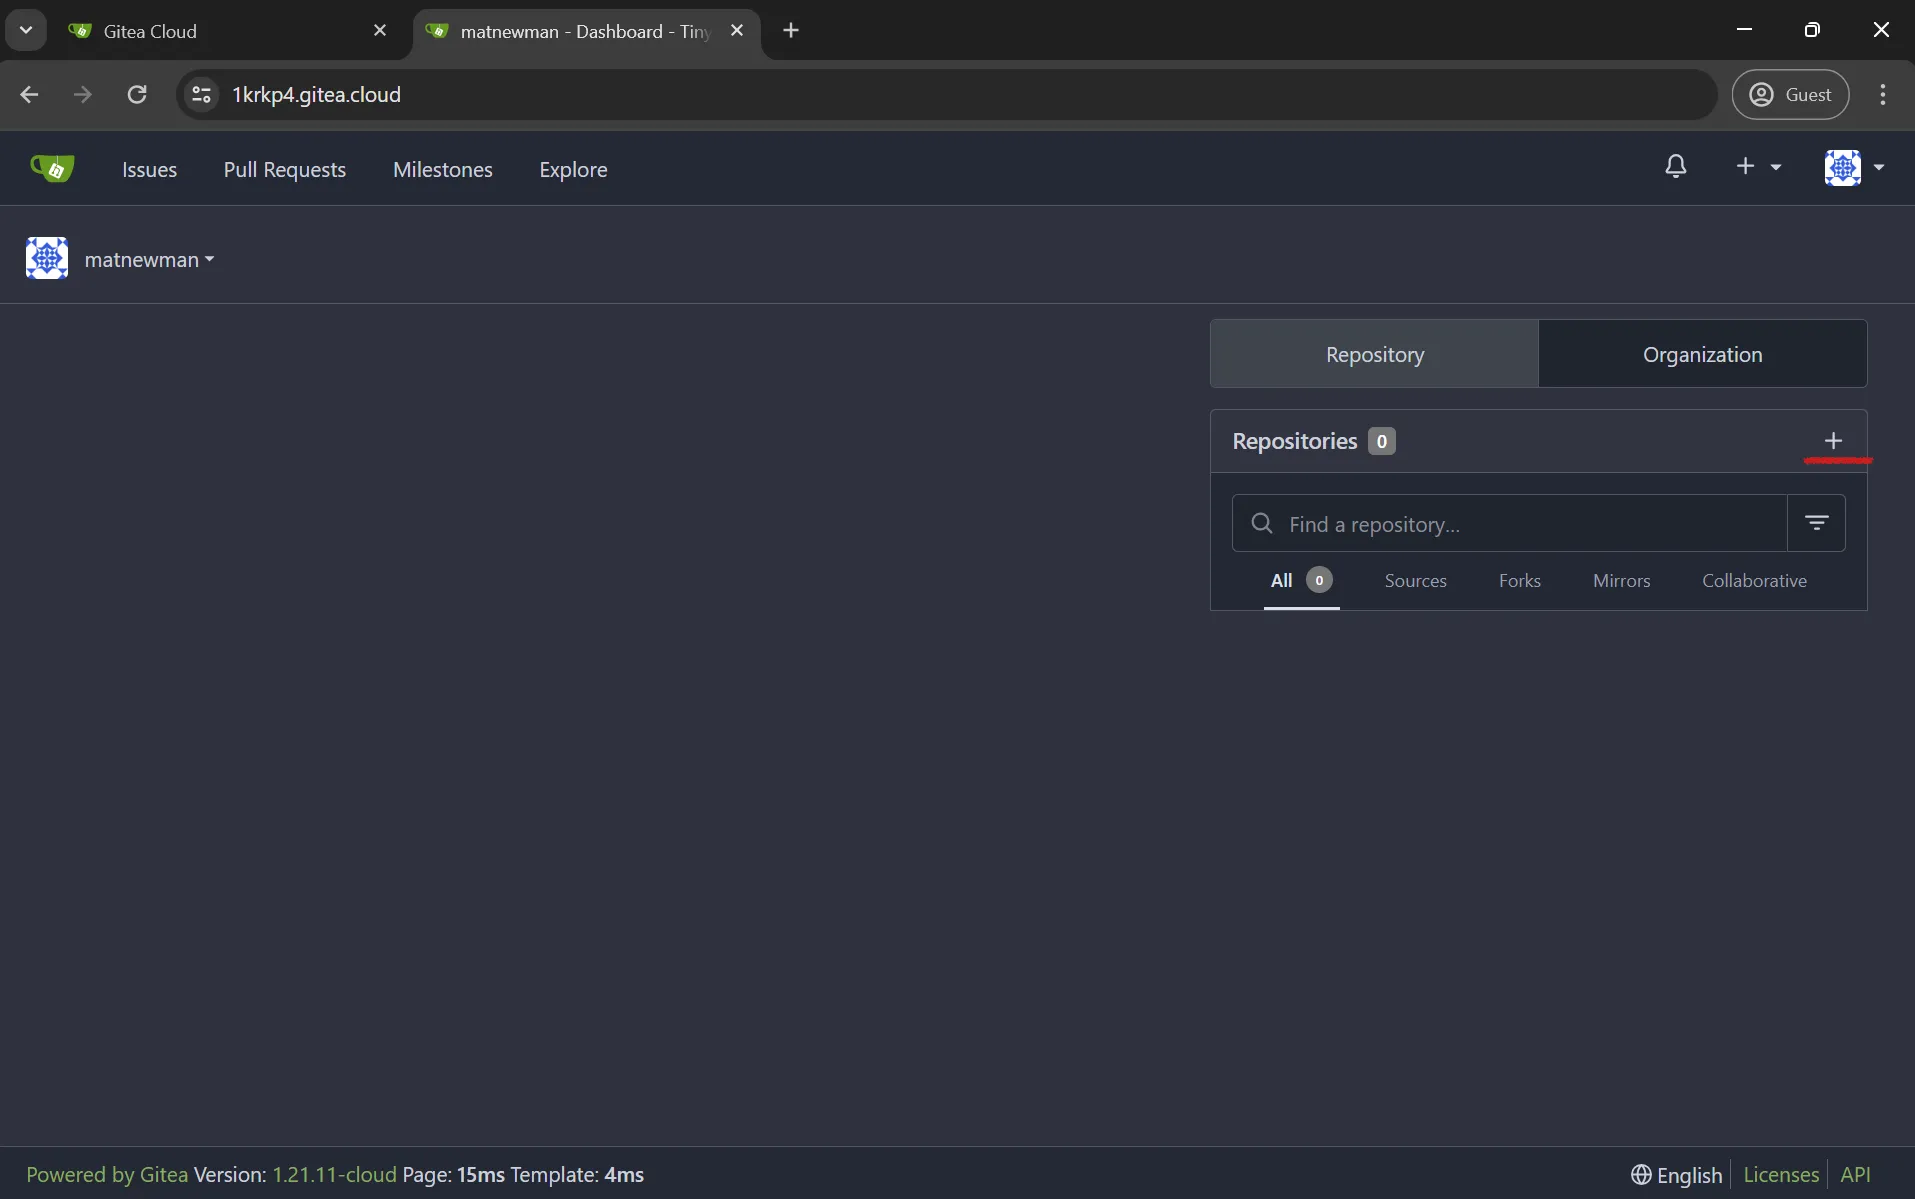
Your Gitea instance should be running. Access it by clicking on the endpoint domain.
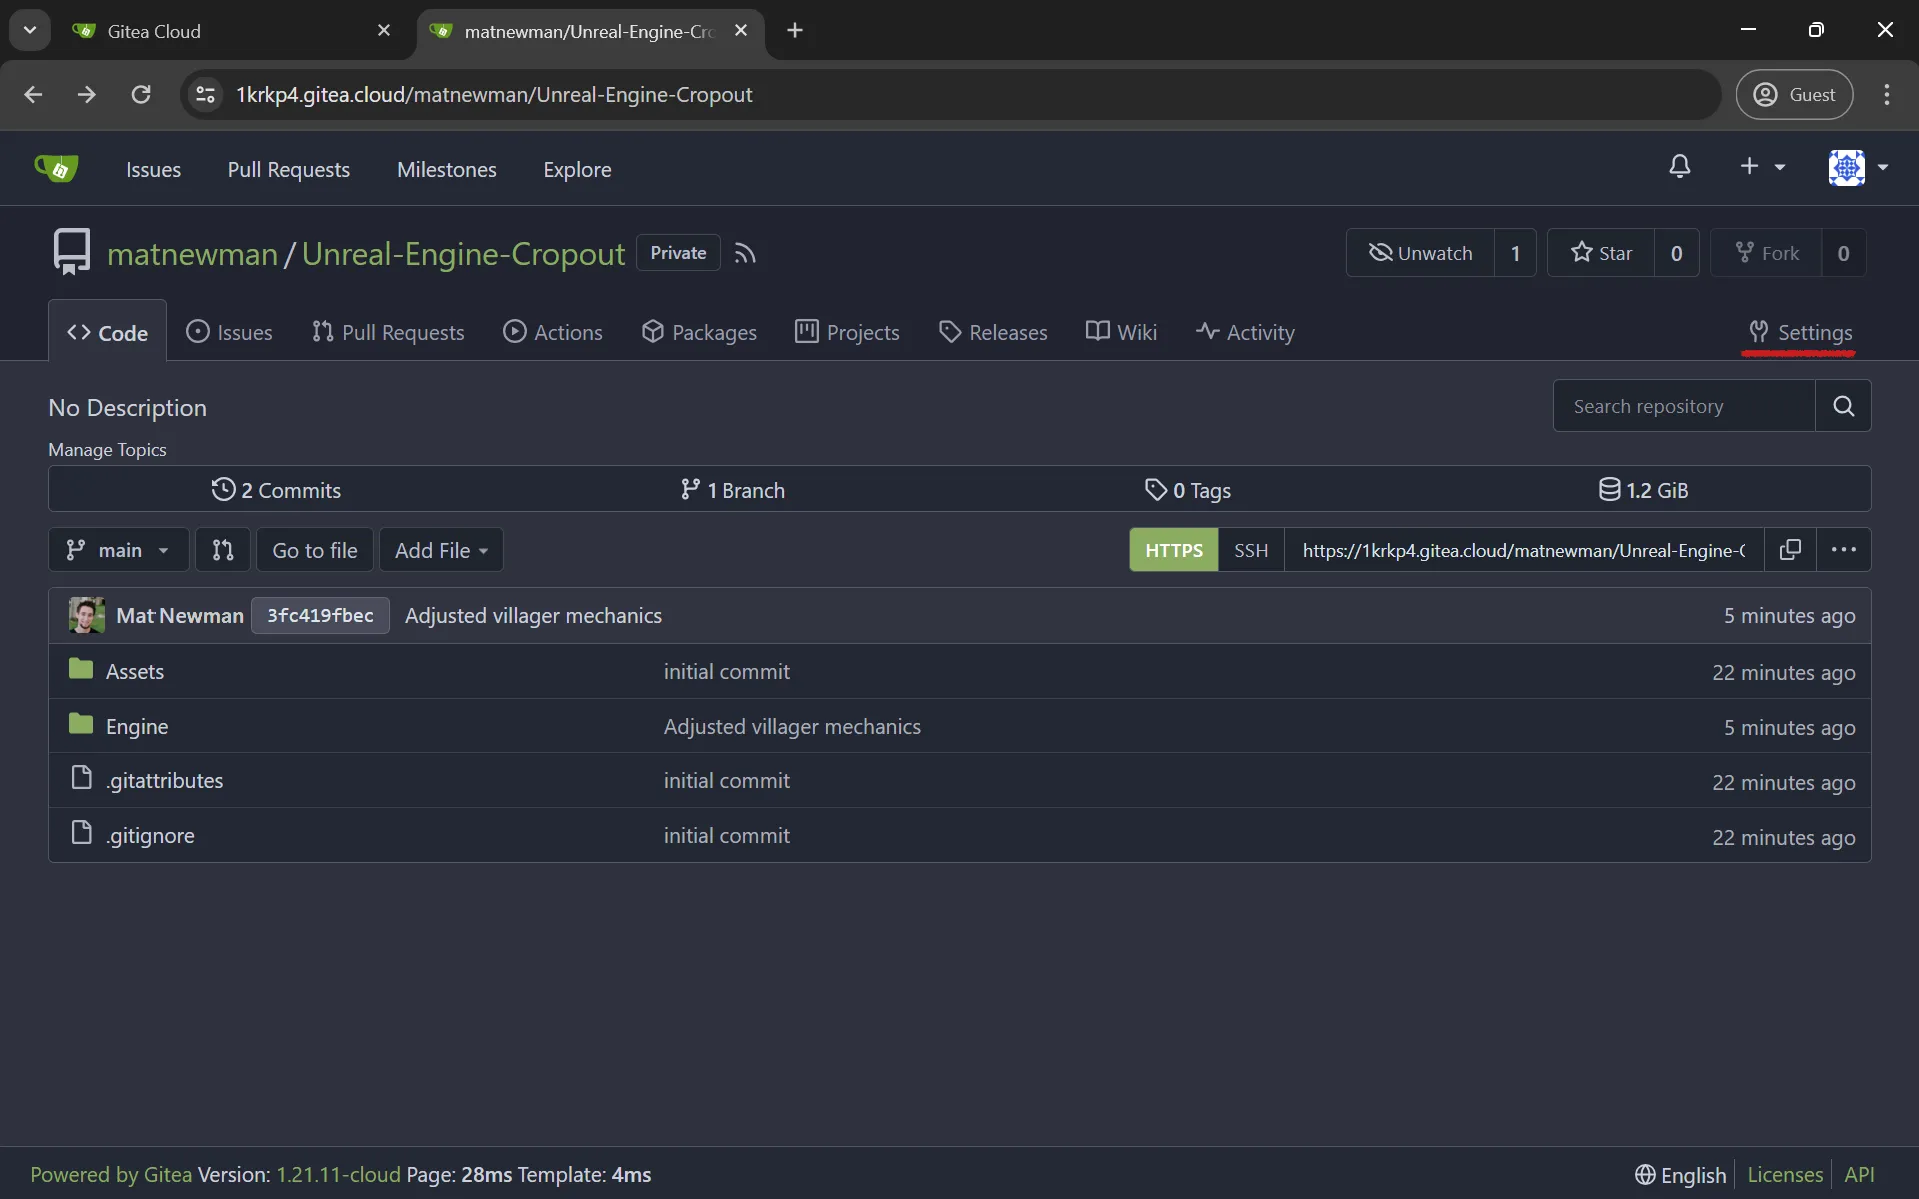
Creating a repository in Gitea
Once we have a running instance, we want to create our Git repository and add a team member. If you are familiar with Gitea, you can skip to the next section.

Sign in with credentials that you provided during the instance setup
Create a new Git repository

Enter a meaningful repository name. Make it private. Especially if you're using paid assets from an asset store, you don't want them available for unrestricted download on the Internet.

Copy the repository link to clipboard. You will use it later in your Git client
Pushing files to your instance with Anchorpoint
You can also use the Git command line or another Git client. Once you have downloaded and installed Anchorpoint, it will start a trial version with access to all features. A free version is also available.

Scroll to the projects section and click on “New Project”

Browse to your Unreal Engine project and under "Remote Settings" select "Connect existing repository via https". Anchorpoint will then try to authenticate with Gitea. Click on "Login to Git".
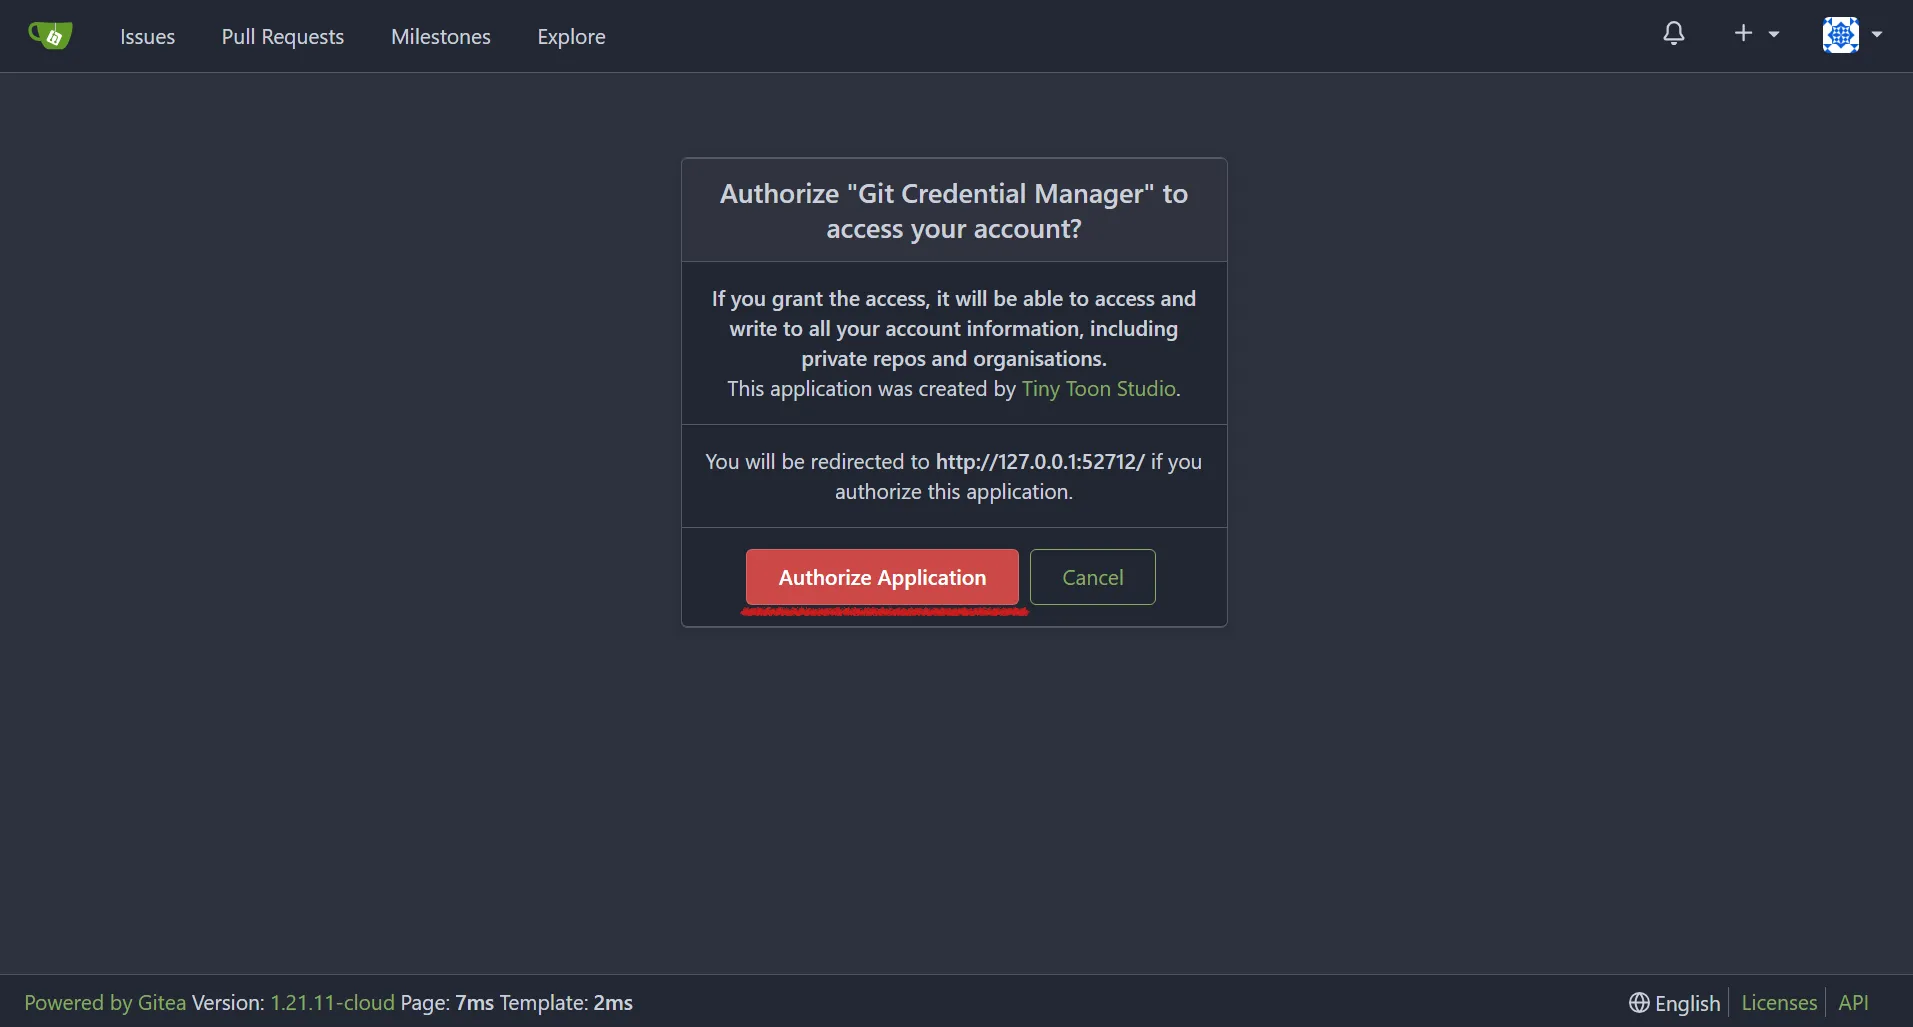
The "Login to Git" button will redirect you to your Gitea instance and ask for authorization. Click "Authorize Application".

Once the authorization is complete, go back to Anchorpoint. Select a .gitignore for Unreal Engine and proceed to the next step. In the next step you will be asked to enter a project name, which is up to you. You can also skip inviting members at this point and just create the project.
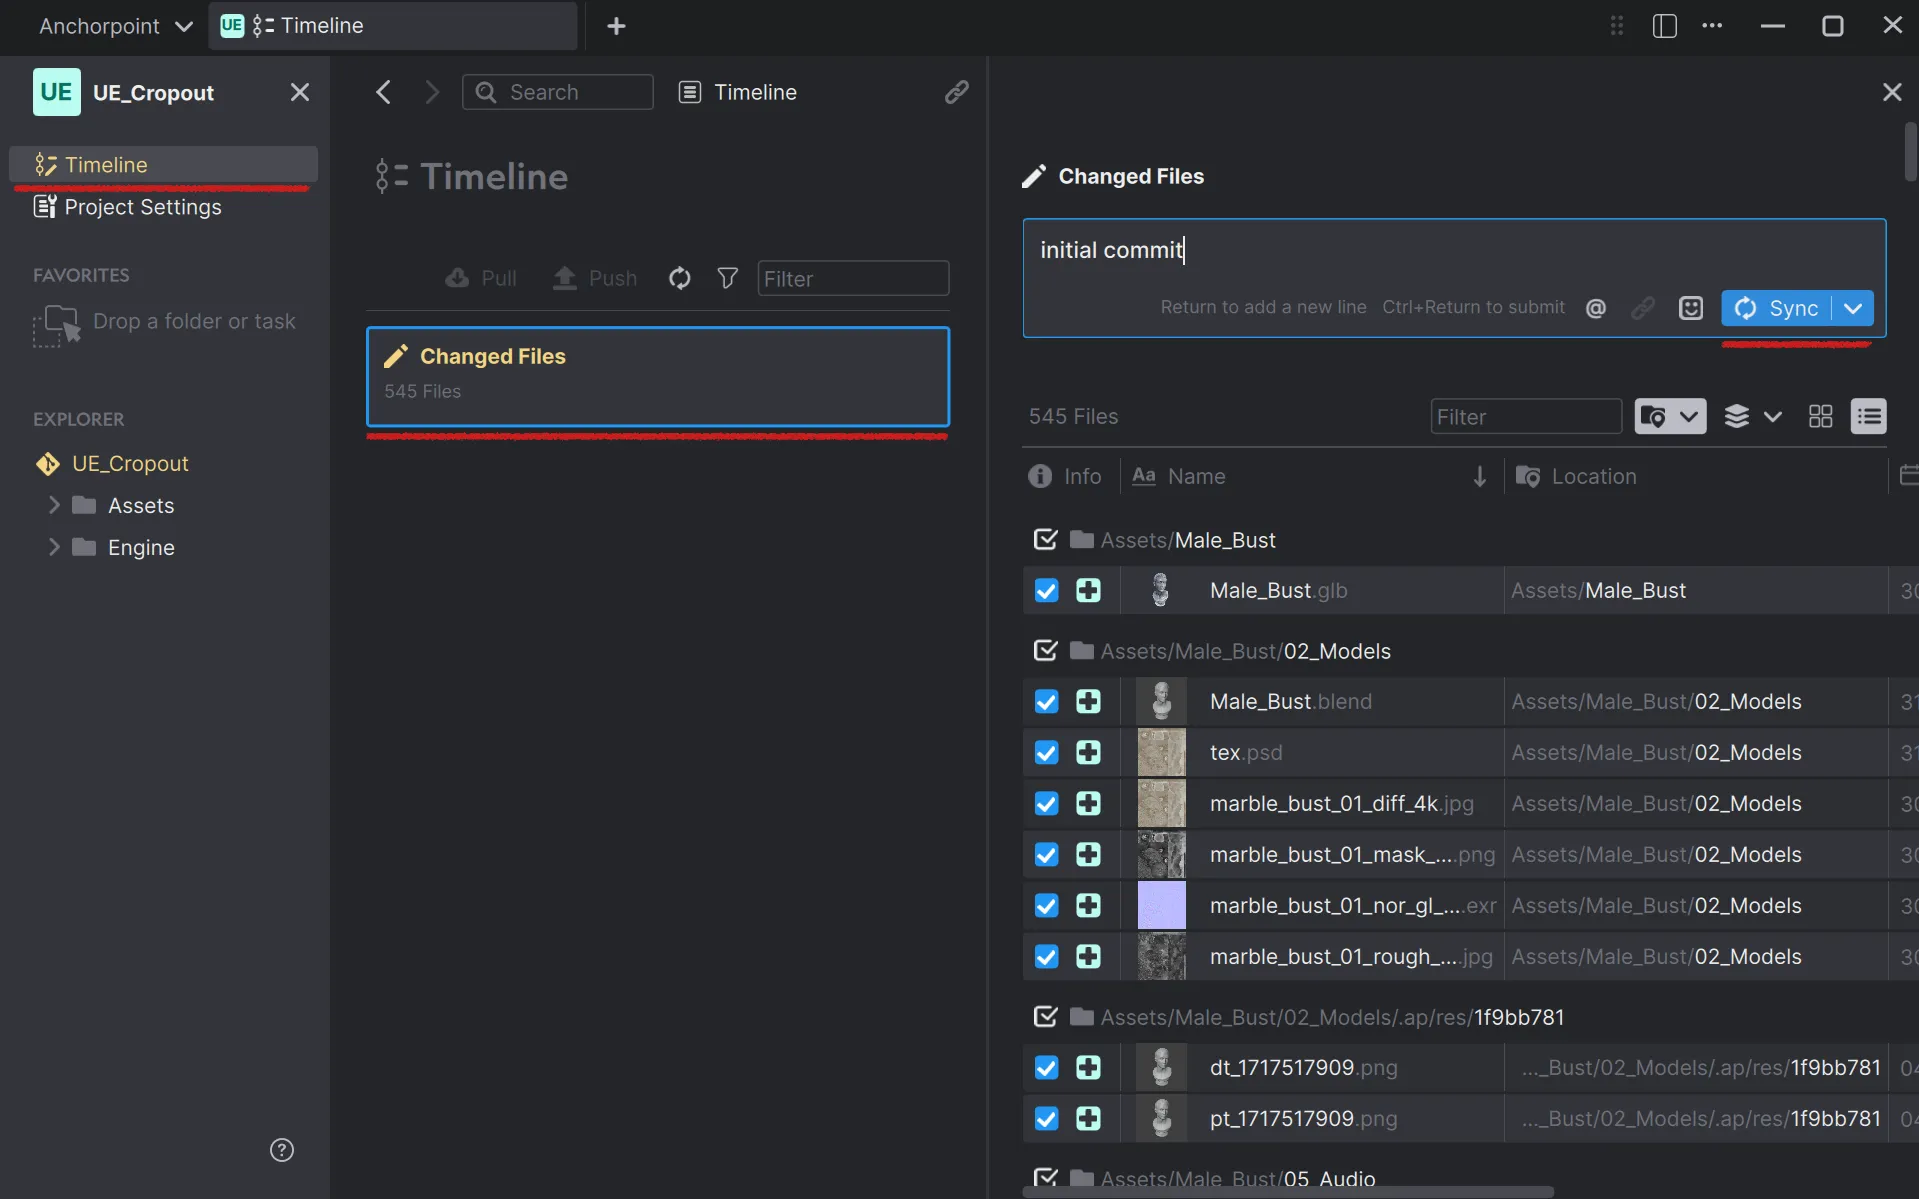
Click on "Timeline" and then on "Changed Files". Write an appropriate message and "sync" all your files with Gitea. "Sync in Anchorpoint is basically a combination of git add, commit, and push. Before adding files to Git, Anchorpoint checks all files for binaries and automatically tracks them as Git LFS.

Technically, Anchorpoint will first do a git lfs push before pushing the git commit. In case of a failure, you can restart the push and it will just start pushing the remaining files to the server.
When you are using the command line, you have to do these things manually. Git LFS needs to be installed already. You can also use this .gitignore config for Unreal Engine.
Using Git LFS from the command line
Make sure to add all file types that you are using in this project.
git lfs track "*.uasset”
Stage your files
git add .
Make a commit with the message "Initial commit"
git commit -m "Initial commit"
Create the remote branch (you only have to do this once)
git branch -M main
git remote add origin REPOSITORYURL
Push the files to Gitea
git push -u origin main

Once our files are pushed, they should be on Gitea. Refresh the repository page to see them.
Working in Unreal Engine
When you modify files in Unreal Engine, you need to make sure that no one else is working on them to prevent conflicts. This is where file locking comes in. Anchorpoint locks files for others immediately after you change them. It uses its own file locking system that works in real time.

You will see that Anchorpoint has detected the file change. Changed files are automatically locked for other members.
Git LFS file locking
If you want to use the command line, you can still use the native Git LFS file locking. Keep in mind that the file is locked on the other side only after executing a Git fetch command. First of all, you need to set up your .gitattributes file and add the --lockable flag to the end of each file. For example:
.uasset filter=lfs diff=lfs merge=lfs -text --lockable
Locking and Unlocking Files
To lock a file from the command line, use the following command:
git lfs lock <filename>
To unlock a file, use:
git lfs unlock <filename>
To see all files that are locked, use:
git lfs locks
To unlock files from other people who have forgotten to unlock them, use:
git lfs unlock <filename> --force
Adding members to your project
We need to add members to our Gitea server as well as to Anchorpoint via email. This process only needs to be done once. Later we can quickly assign them to the repository/project.

On Gitea, go to your profile picture and from the menu pick “Site Administration”

Click on User Accounts and pick “Create User Account”

Add a new user, using the email address and a username, that will be required for the login. Now, you have added your user to your site.
The user needs to be assigned to the repository. Go to your repository and click on “Settings”.
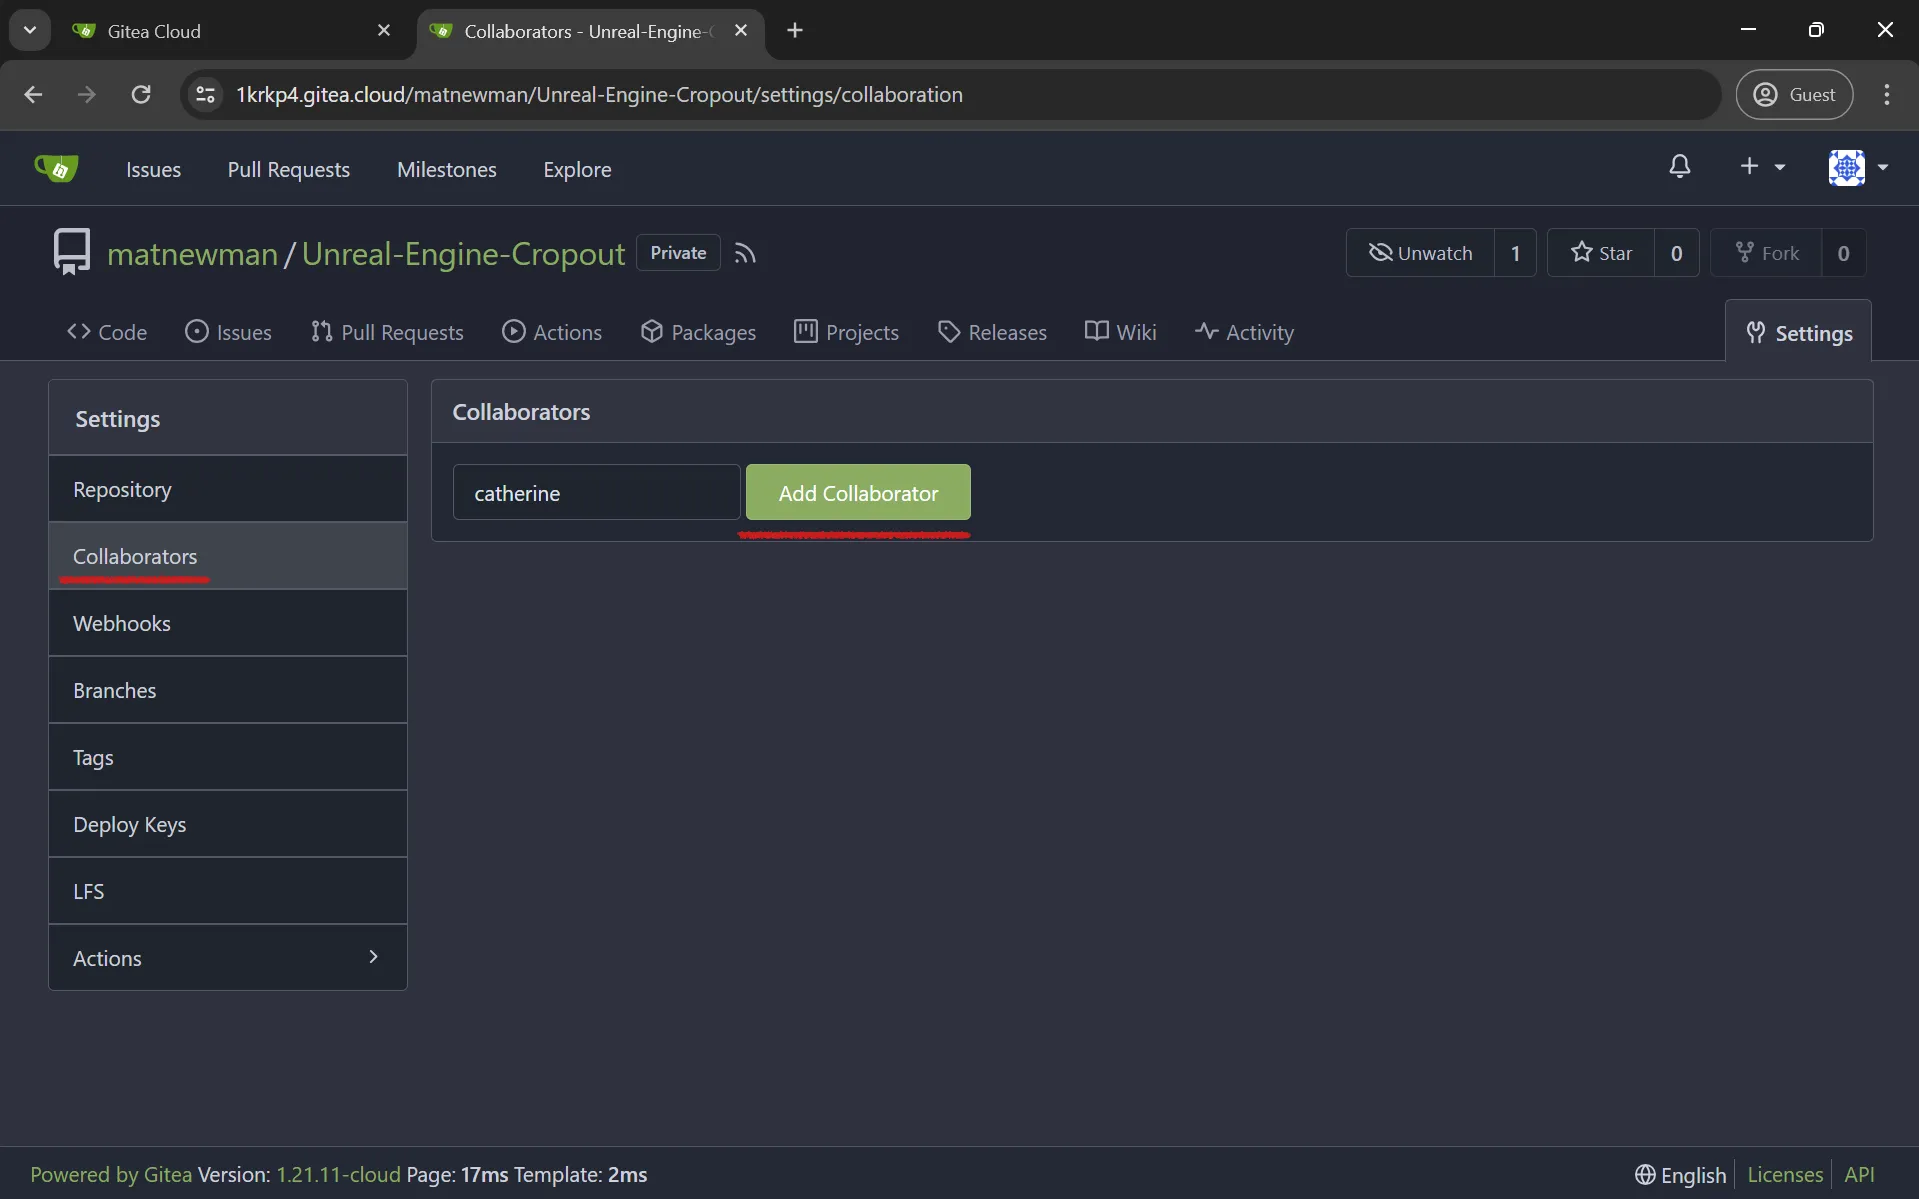
Under Collaborators, pick “Add Collaborator” and pick your newly created user

In Anchorpoint, go to “Project Settings” and pick “Members”

Click on Assign Members and add your user with the same email that you used in Gitea.
Participating as another member
If your member is added to Gitea and Anchorpoint, she can clone the Git repository. If your team member only wants to work on the Unreal Engine project and not the art files, she can use Git sparse checkout to download only the Engine folder. Sparse checkout allows you to work with huge TB repositories.
Join the Git repository and pick the folders you want to download in Anchorpoint
When other members open Anchorpoint, they are invited to your workspace. Then they need to click on your project name and press the big blue "Join Git repository" button.

When you are invited to join an Anchorpoint project as another member, you will be asked to join the Git repository.

The first step is to login to Git like we did when we created the repository

Disable the “Download Everything” checkbox to selectively pick what you want to work on

Pick the “Engine” folder and click on “Download Engine” if you would like to only work on the Unreal Engine project and not on the art assets.
Sparse Checkout using Git command line
In the command line, you have to use these commands. To checkout the repository without downloading any content of a subfolder, use:
git clone REPOSITORYURL --sparse
To download the "engine" folder only, use:
git sparse-checkout add Engine
This will download the “Engine” folder, including all its subfolders.
Conclusion
Thanks to the monorepo movement, new features like sparse checkout in Git make it more scalable, and with Git LFS it can be used in game development. Especially for indie and AA development, it is a good choice because you benefit from the huge Git ecosystem.
We hope you enjoyed this article and that it helped you understand how to set up a Gitea Cloud instance for your next Unreal Engine, Unity or Godot project.